How to build a herb spiral

The herb spiral is the darling of the permaculture world. It’s multi-functional, creates microclimates, and mimics mother nature. The spiral is an extremely common pattern in nature (think seashells, flower petals, plant leaves, pine cones, spider webs), and using a spiral for your herb garden does have some serious advantages.
The structure has a small footprint, but delivers lots of accessible growing space.
The height of the spiral creates shade and sun zones.
The rock used in the spiral holds thermal mass - it keeps heat.
The soil on the top of the spiral remains drier, while the bottom will be more moist.
They look beautiful, and are great garden conversation structures.
Materials
Soil
Compost and any other soil amendments
2” corrugated drain pipe (wide enough to put a hose through) - at least 6 feet long
Lots of rocks - large, medium & small
Thick cardboard
Sod cutter (if your site has grass)
Shovel
Wheelbarrow
Steps
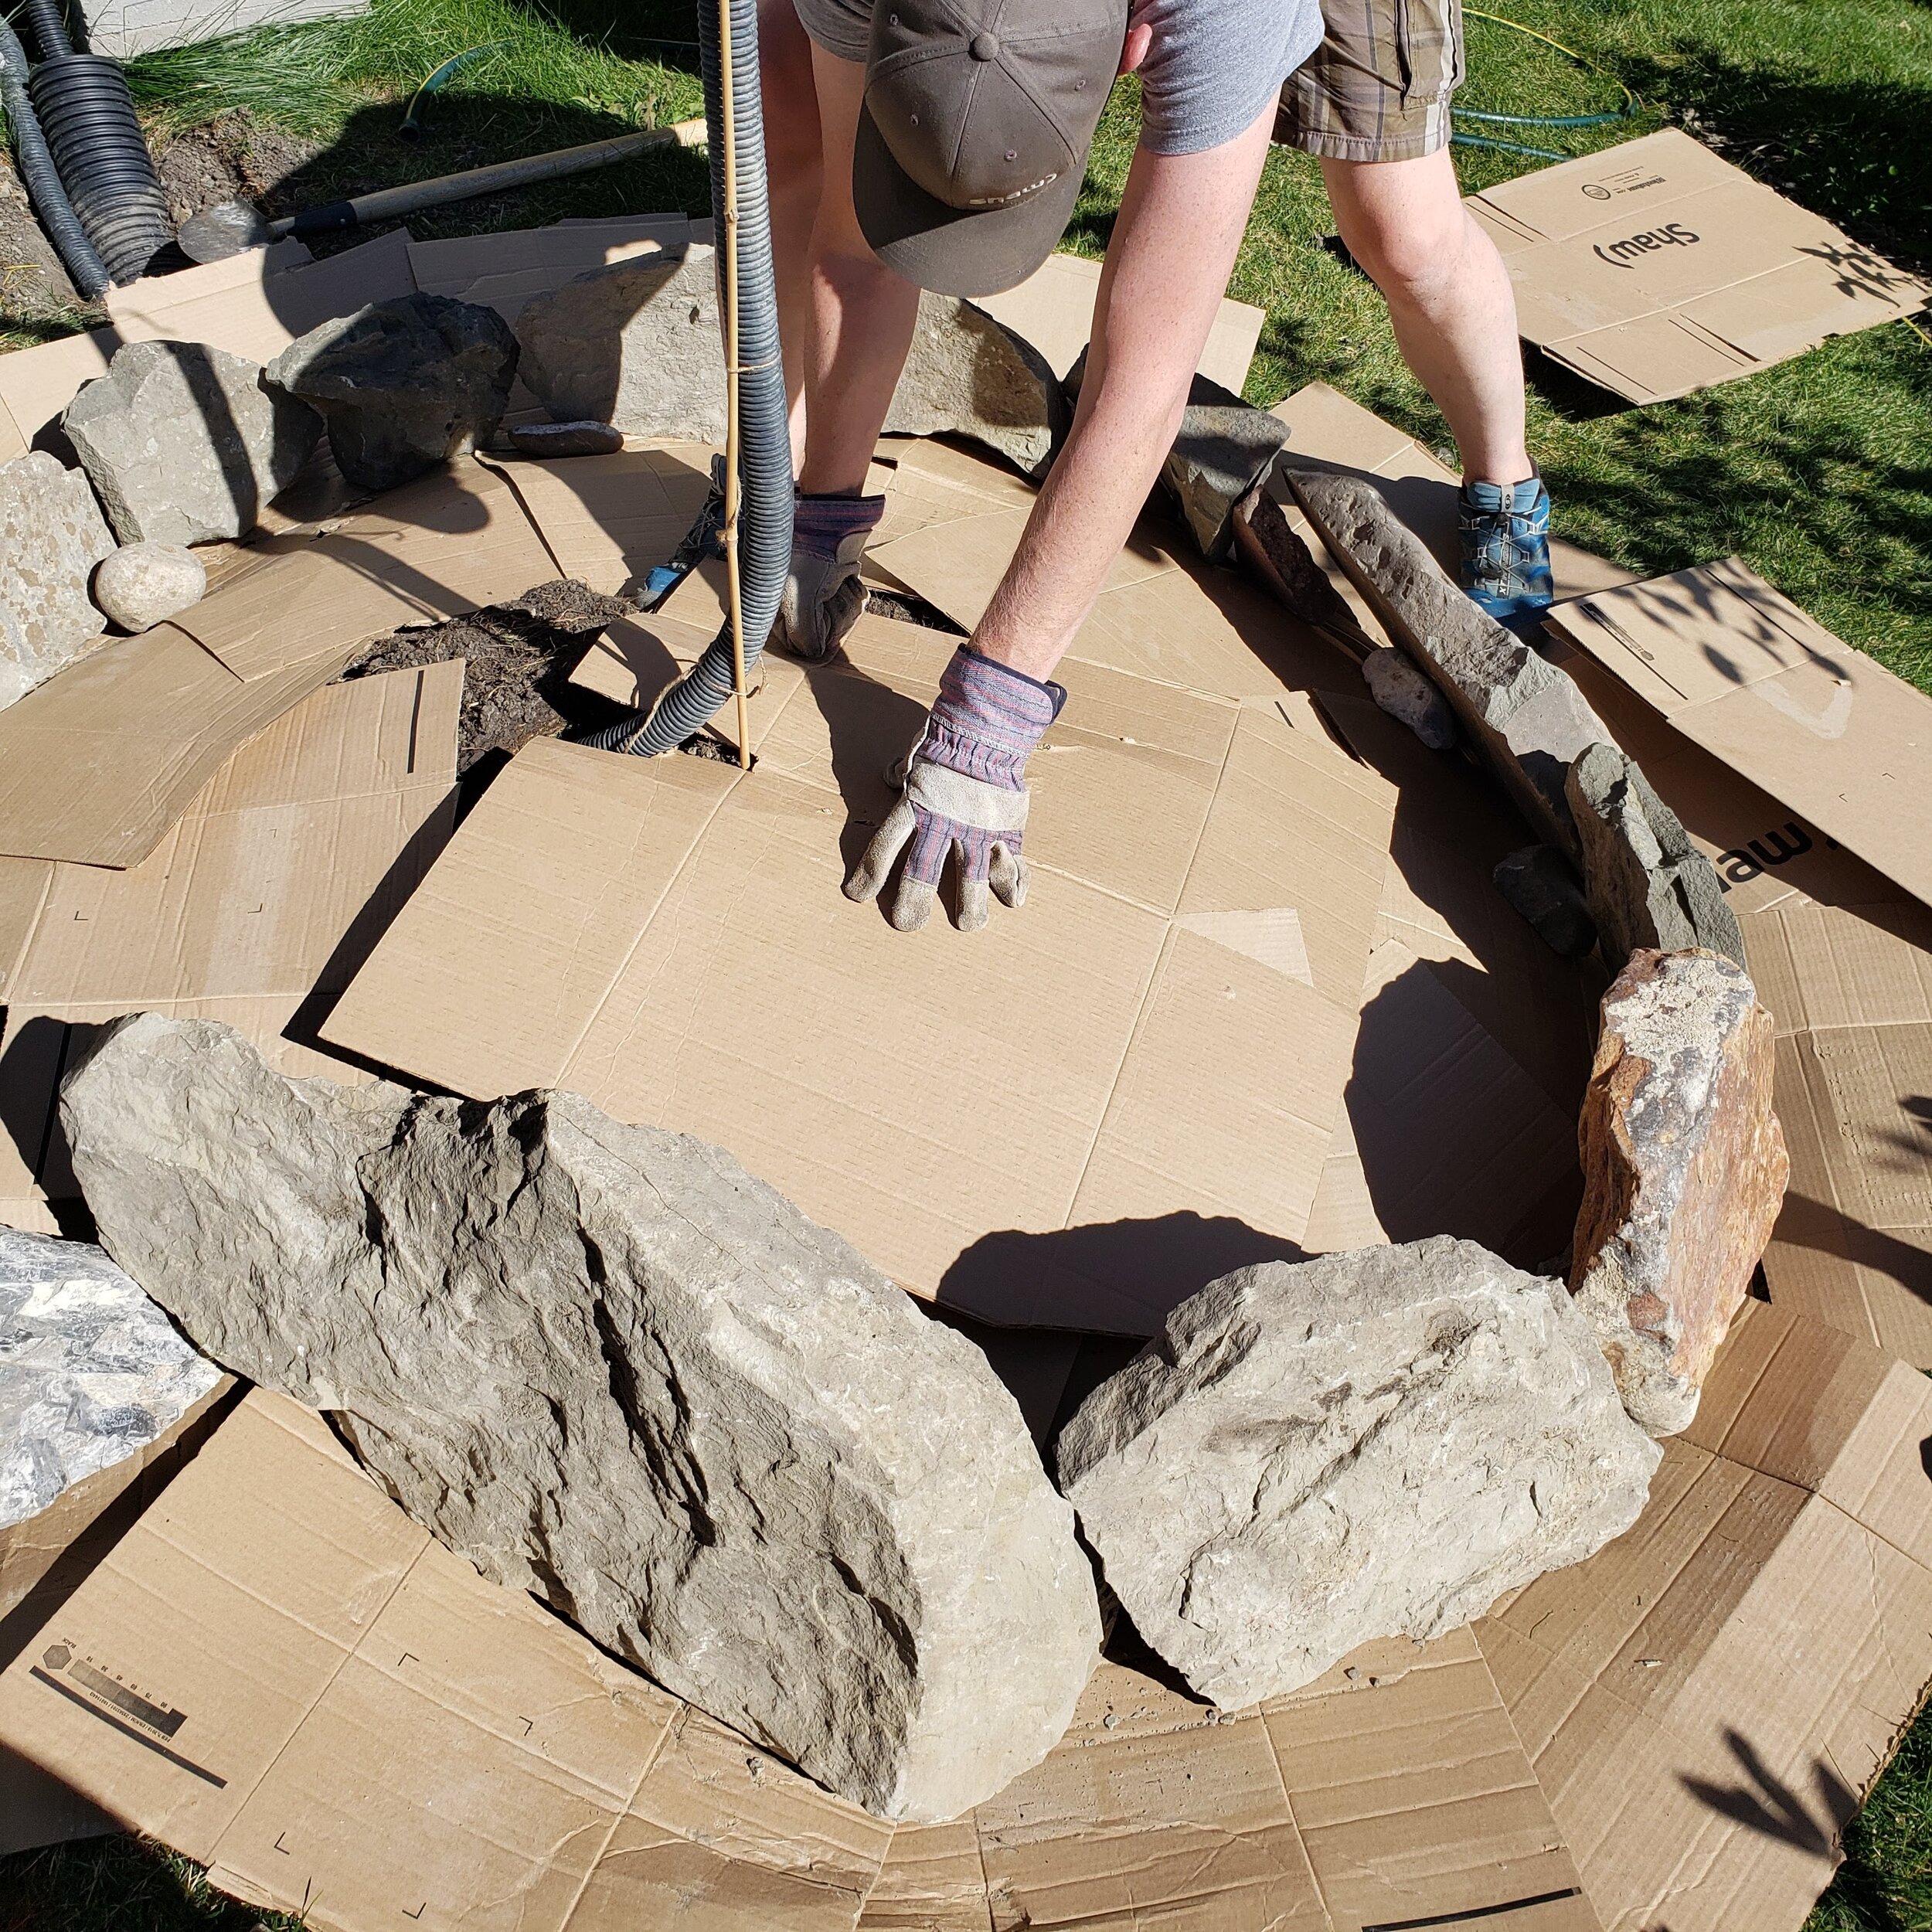
Gather your materials
Decide what materials you want to use to build the structure of your herb spiral. We chose rocks, and sourced them for free. A quick post on our local gardening Facebook page had people begging us to remove the large rocks from their yards. It was hard work, but our investment in our garden is often more time than money. I’ve also seen herb spirals built with bricks, paving stones, even upright logs. In addition to your structural rocks, you’ll need small and medium rocks to fill in spaces in your structure, and to put in the herb spiral itself to fill space and create drainage. You’ll also need garden tools (shovel, sod cutter, and wheelbarrow), soil and amendments, and that corrugated pipe that will be used to create an irrigation system. With all of our free rock, and some leftover soil from an annual bed, our materials were under $50.
Select a site
Select a flat-ish, full sun spot that is close to your kitchen. No one puts baby in a corner, don’t put your herb spiral there either. You’ll use your fresh herbs in the kitchen daily, you want it to be close. The structure will be about 5 feet in diameter, so be sure you have space around the herb spiral to pick the herbs.
Prepare the site
You’re going to create a five foot diameter circle by removing any sod or pioneer plants (my nice word for weeds) from your site. If you are building in an area with grass around it, make that circle 7 feet in diameter, you are going to create a one foot mulch grass barrier around it. You can skip the grass removal, and just created your circle with thick, layered cardboard, but I recommend removing the grass. It’s extra work at the beginning, but saves so much weeding later on!
Now, dig a shallow trench (an inch or two) around the perimeter of the herb spiral structure, this will help secure the first layer of stones. Remember, if you have created a circle wide enough to include a mulch barrier, you are going to dig this trench around the space you will build the actual herb spiral, not around the the full diameter of your circle. Make sense?
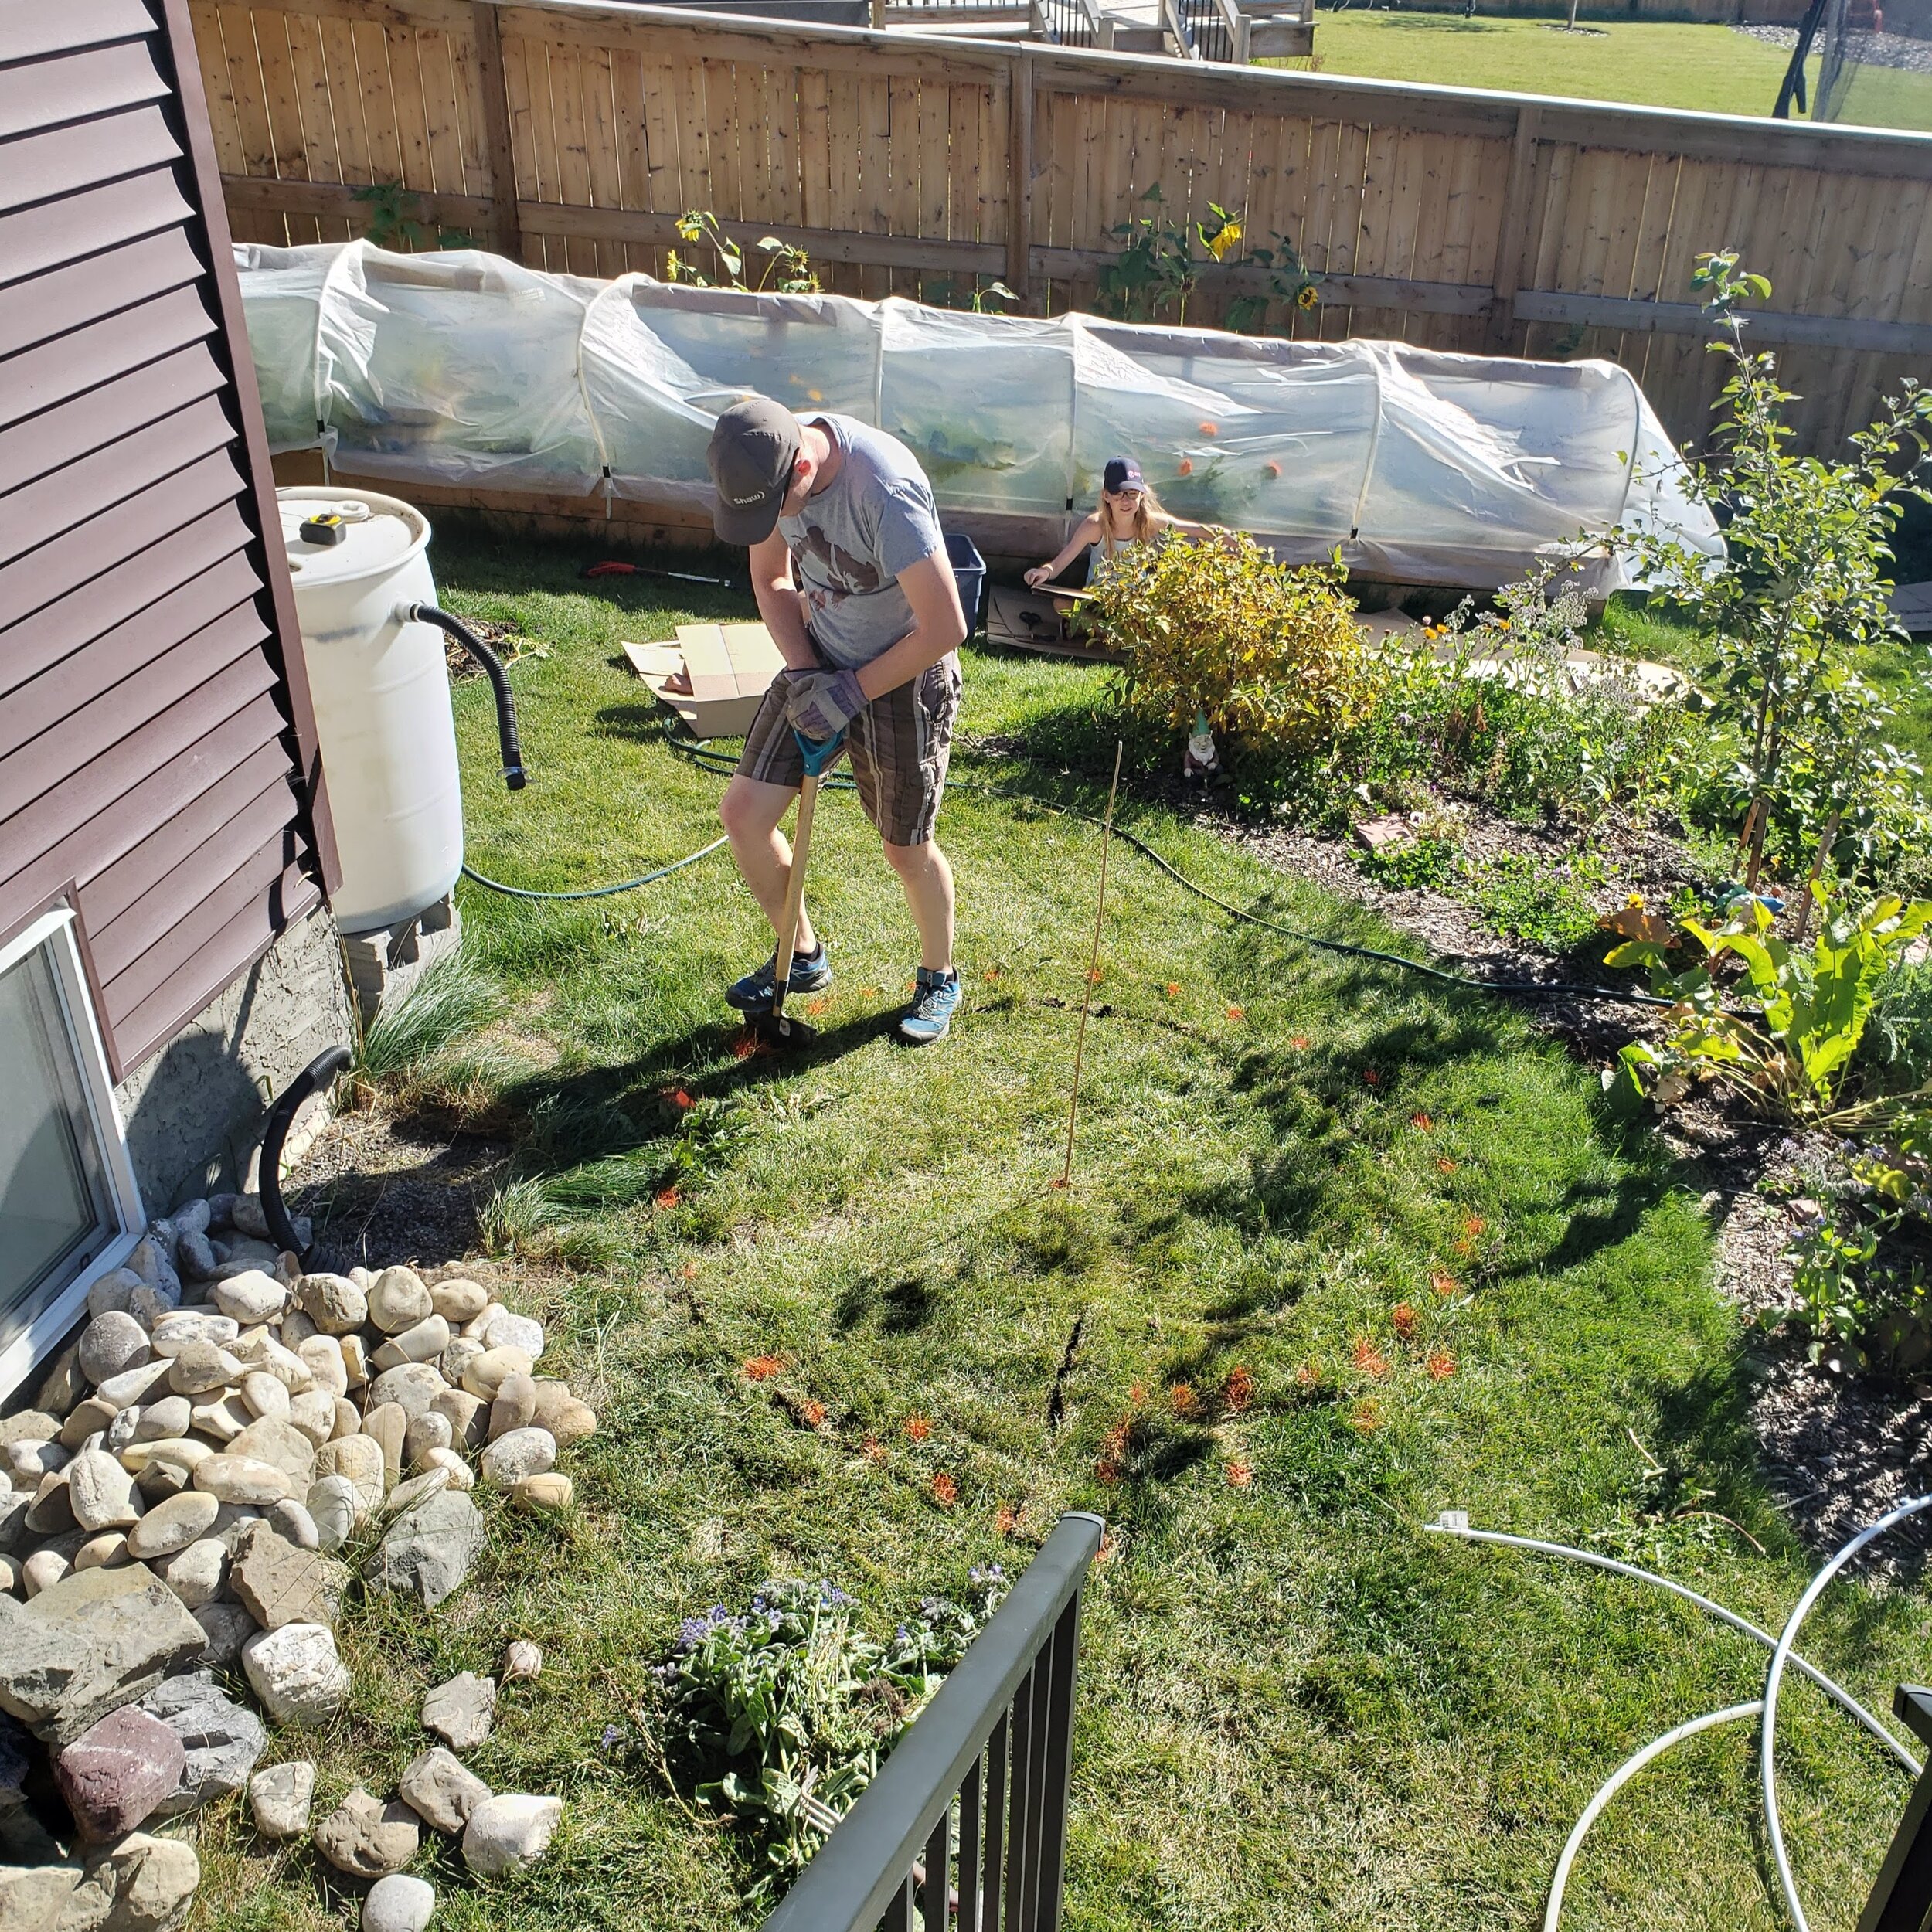
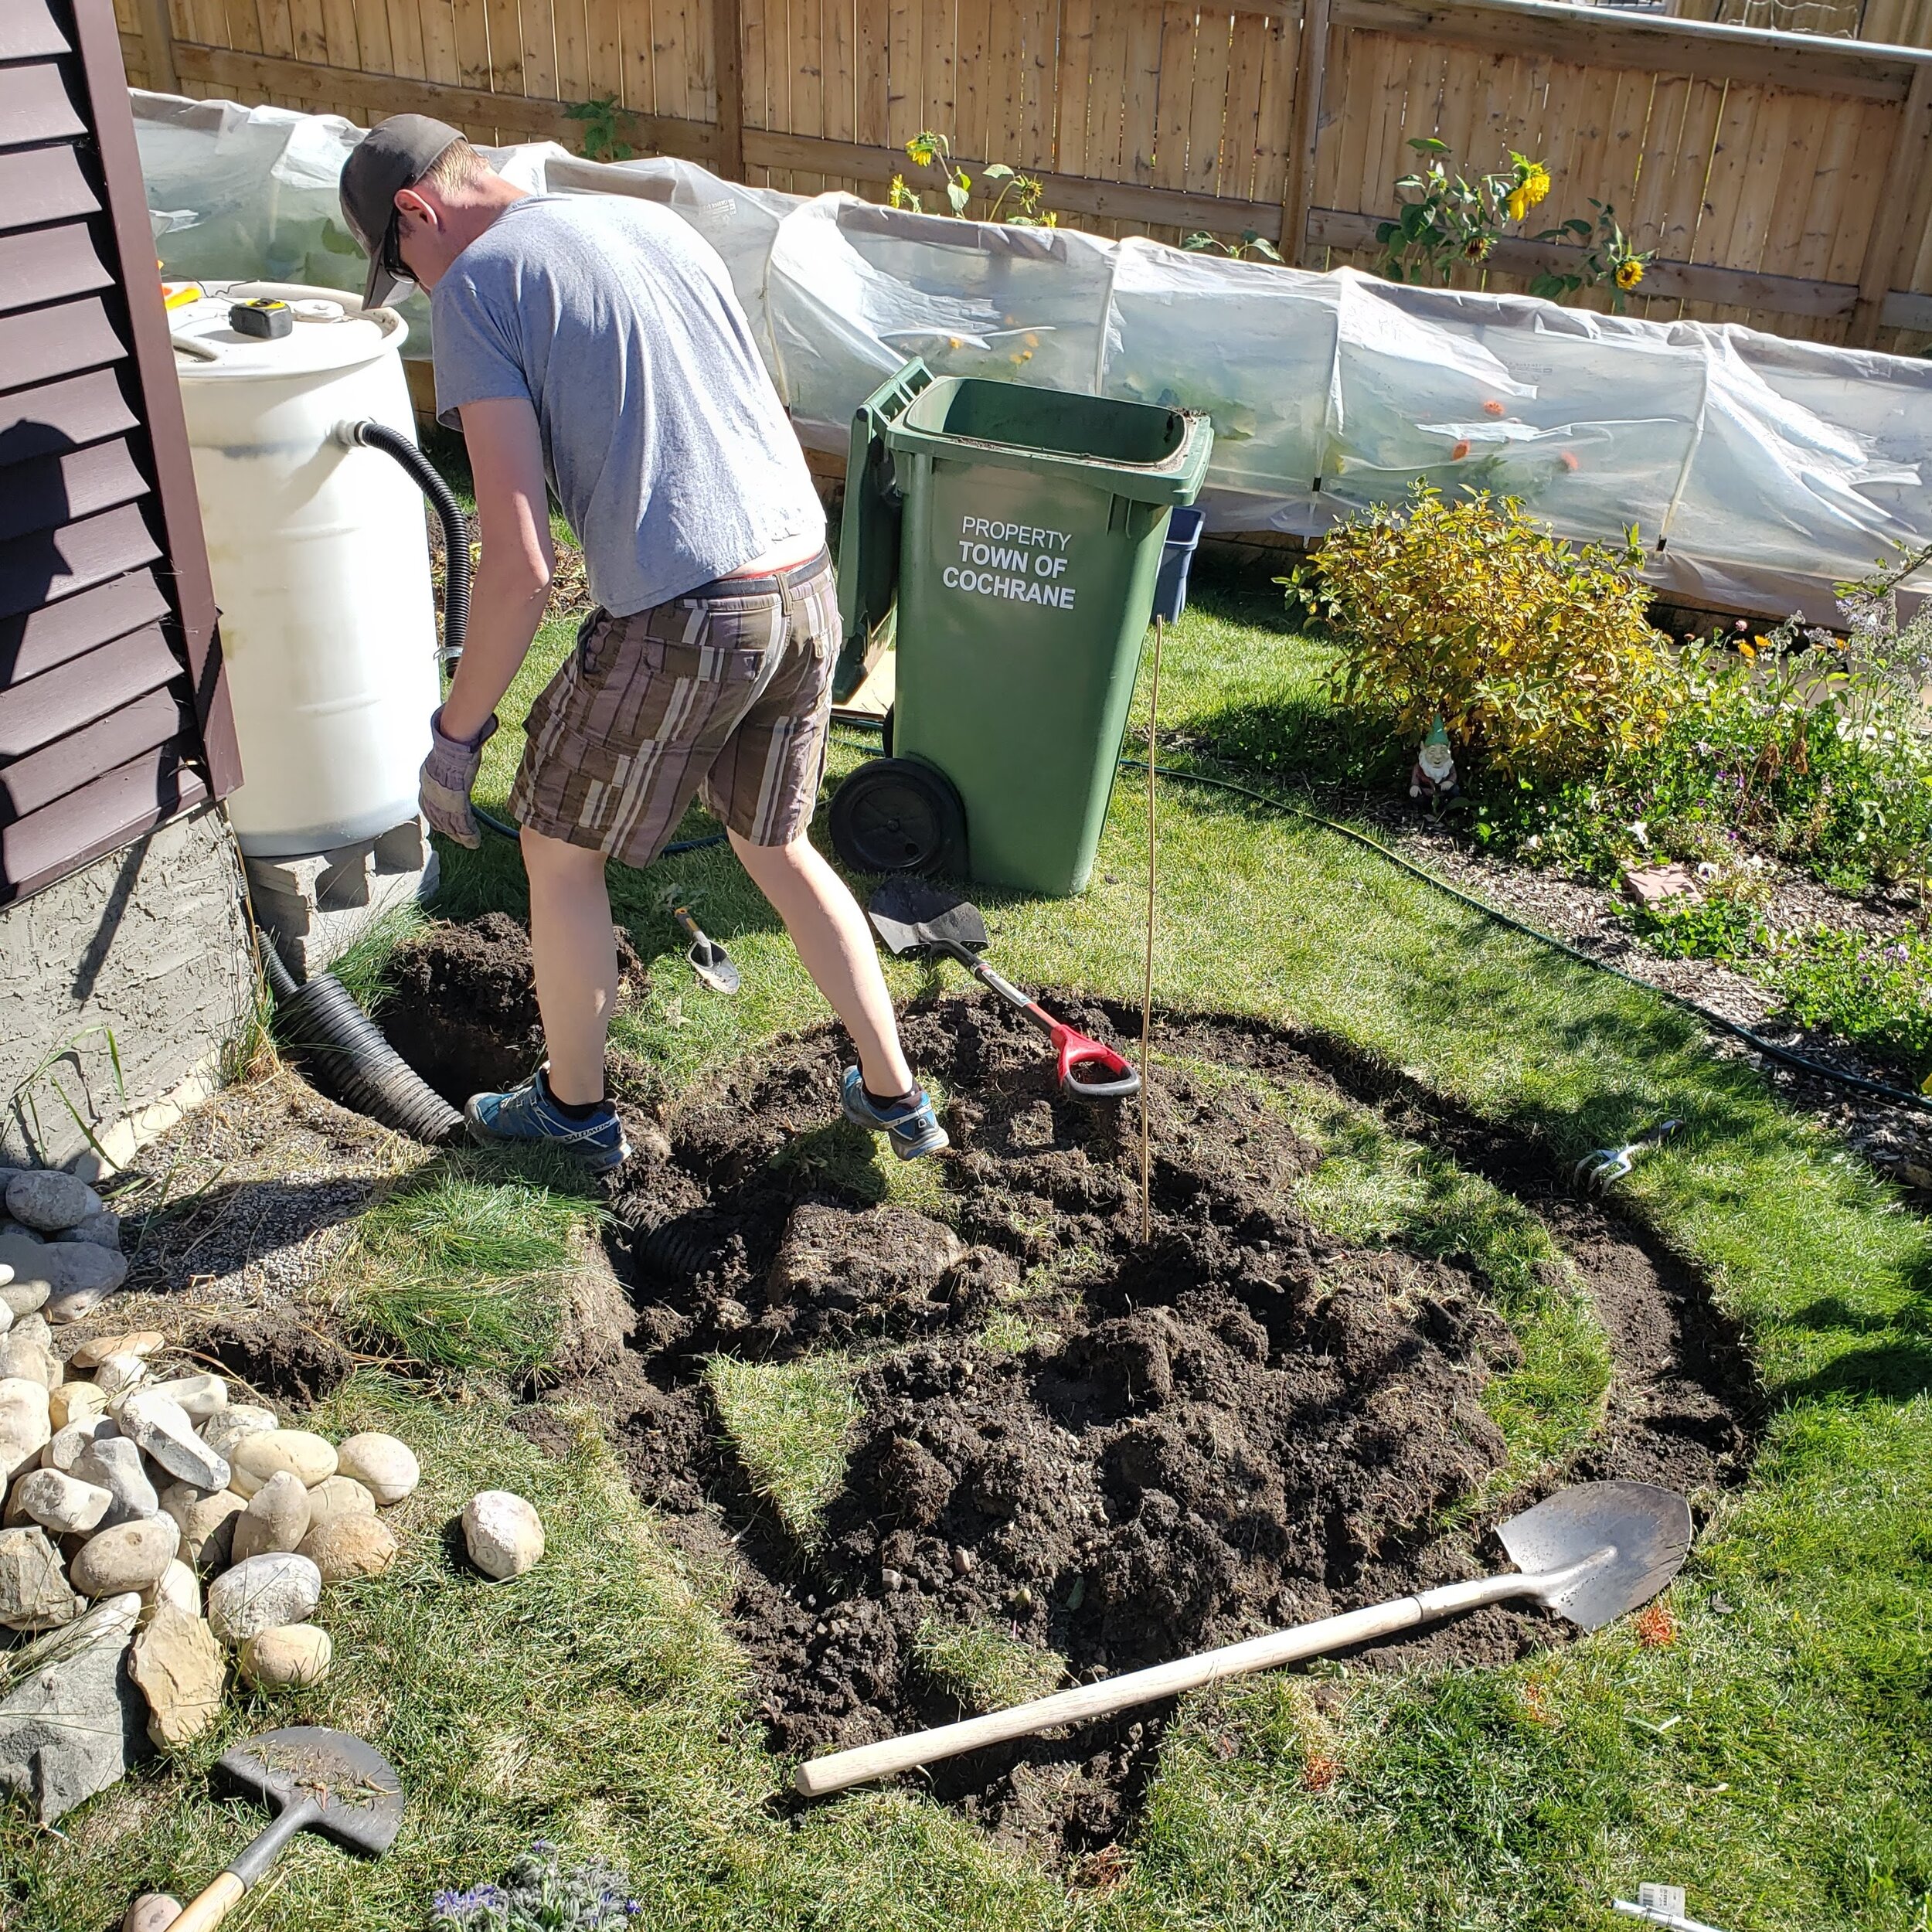
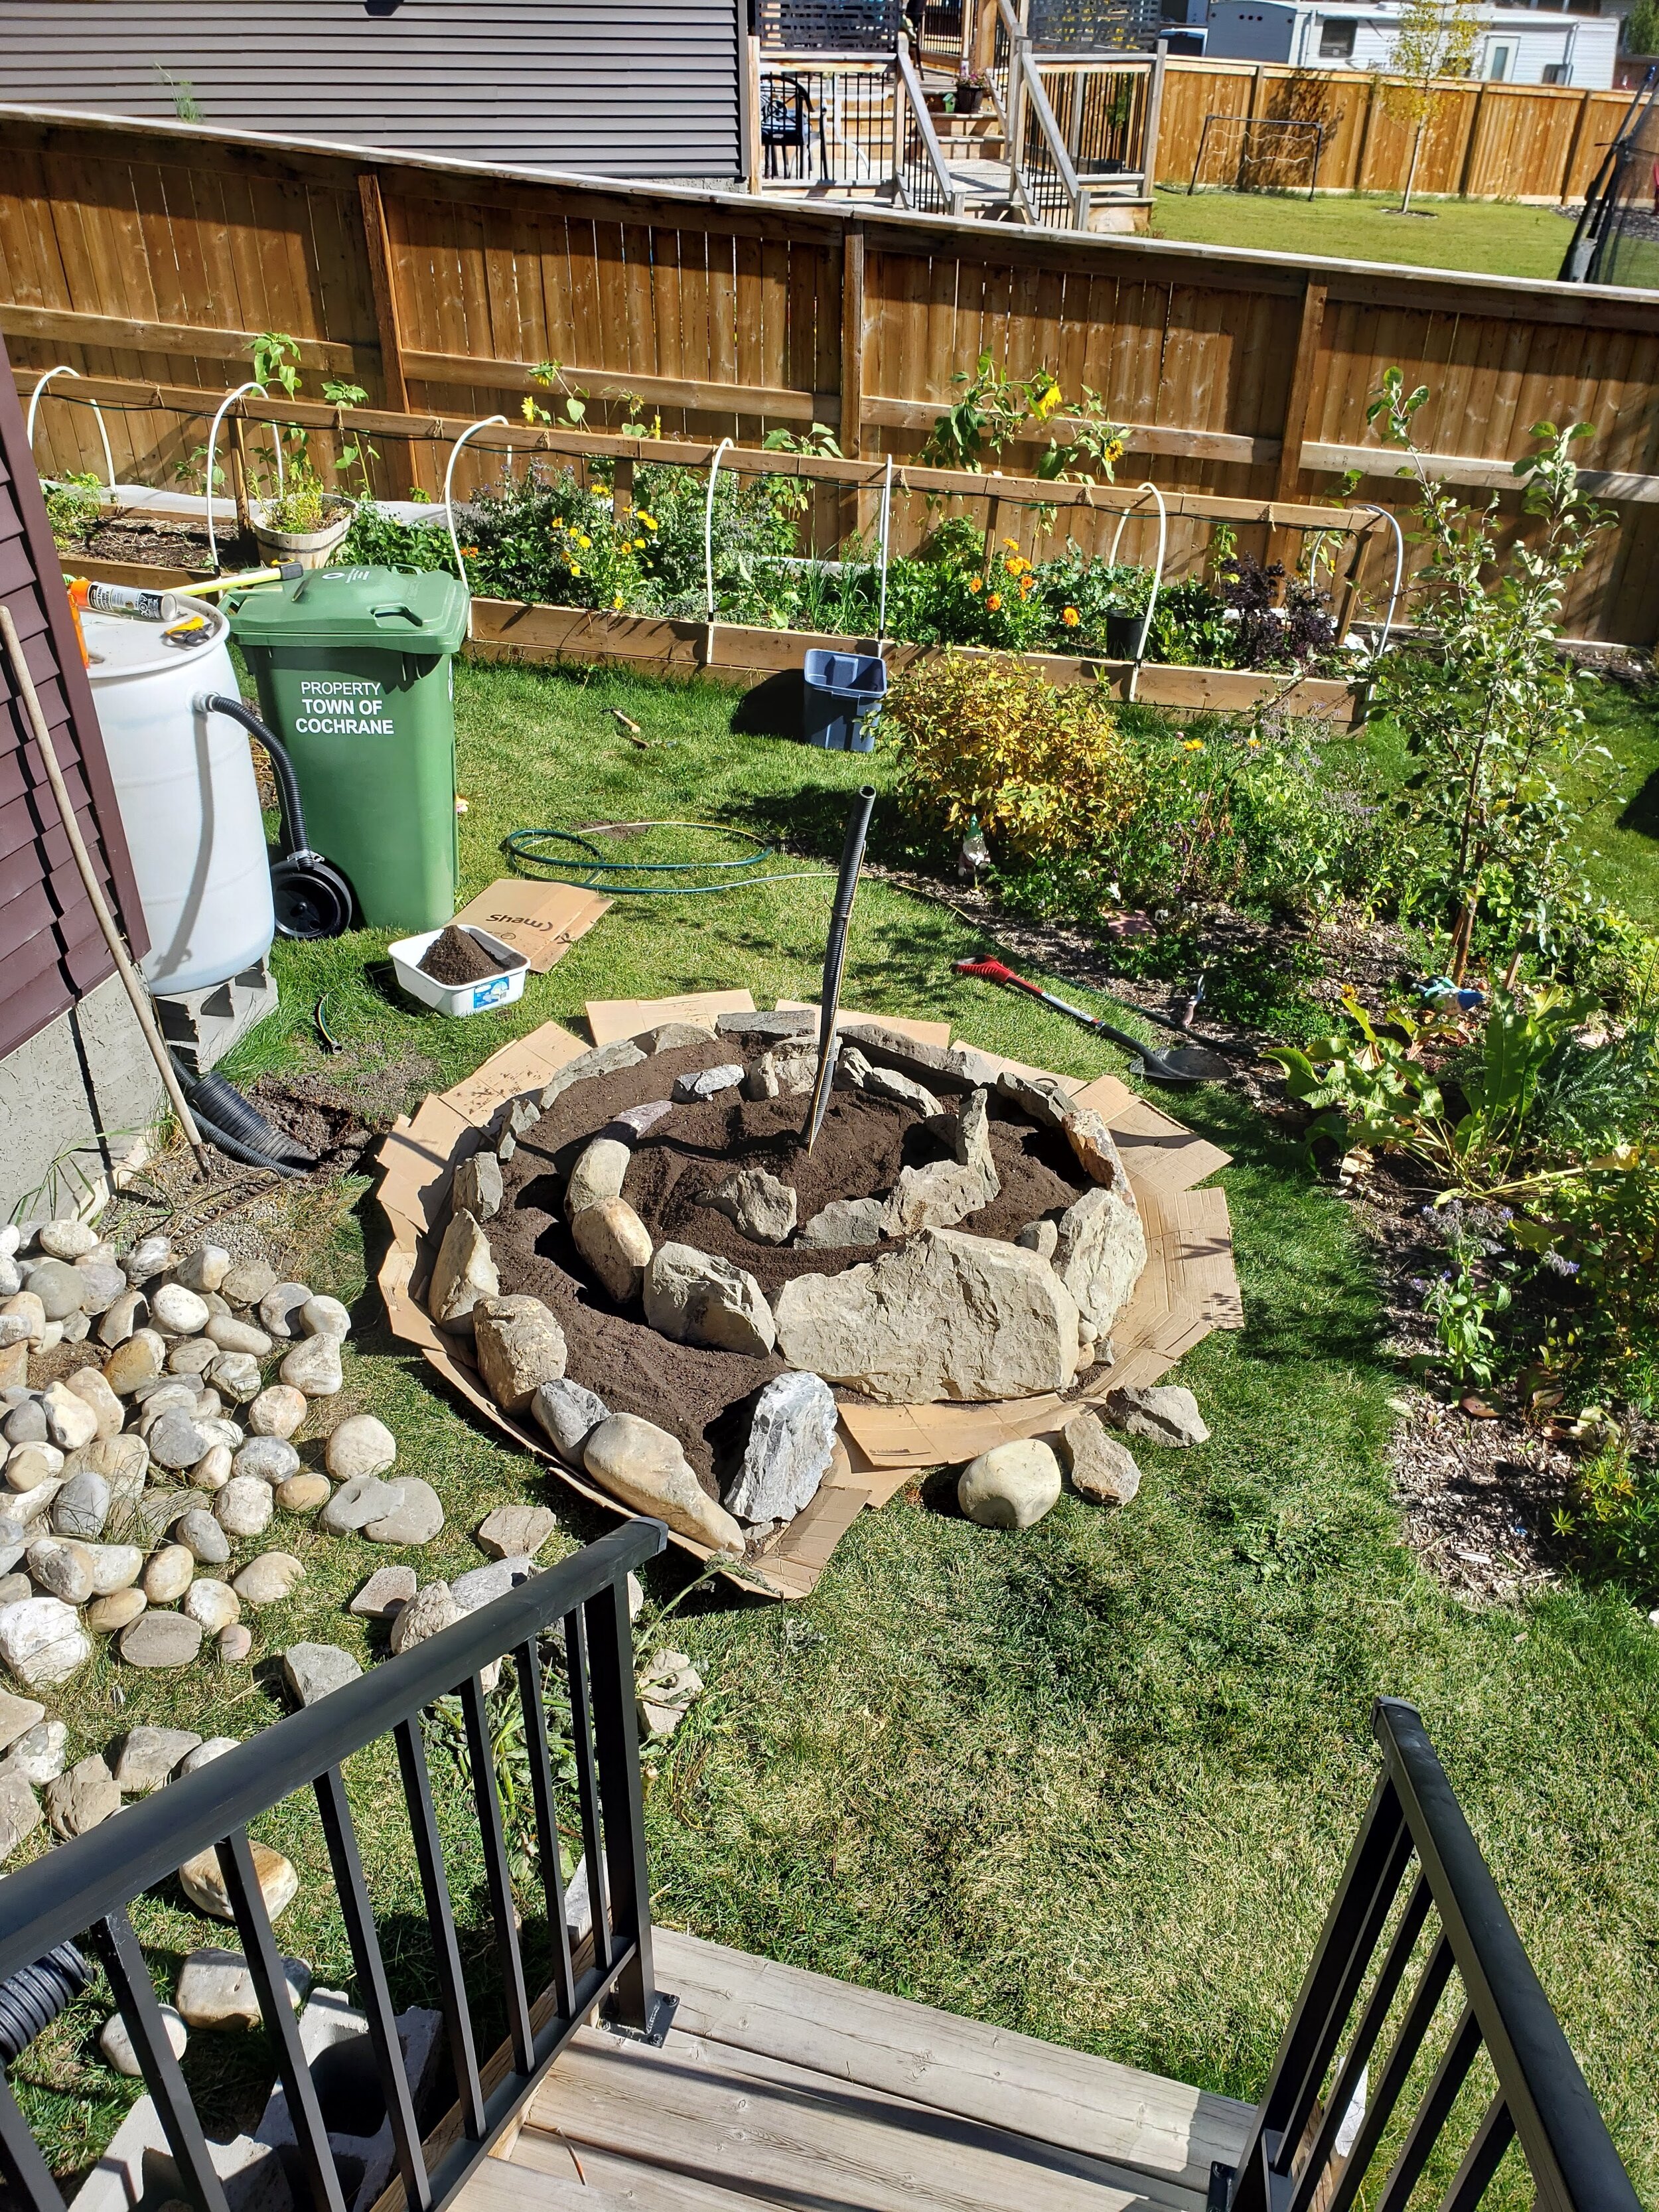
Install the irrigation pipe
This is an optional step, but I strongly recommend it. You’re going to put a stake (at least 3 feet tall) right in the centre of your herb spiral. Attach your corrugated pipe to the stake using jute twine, or some other garden string. This pipe will eventually come out the top of your spiral. Be sure it’s long enough to go beyond the base of your spiral, this end should be faced towards your water source. We didn’t use the irrigation the first year, but will definitely be using it in year 2.

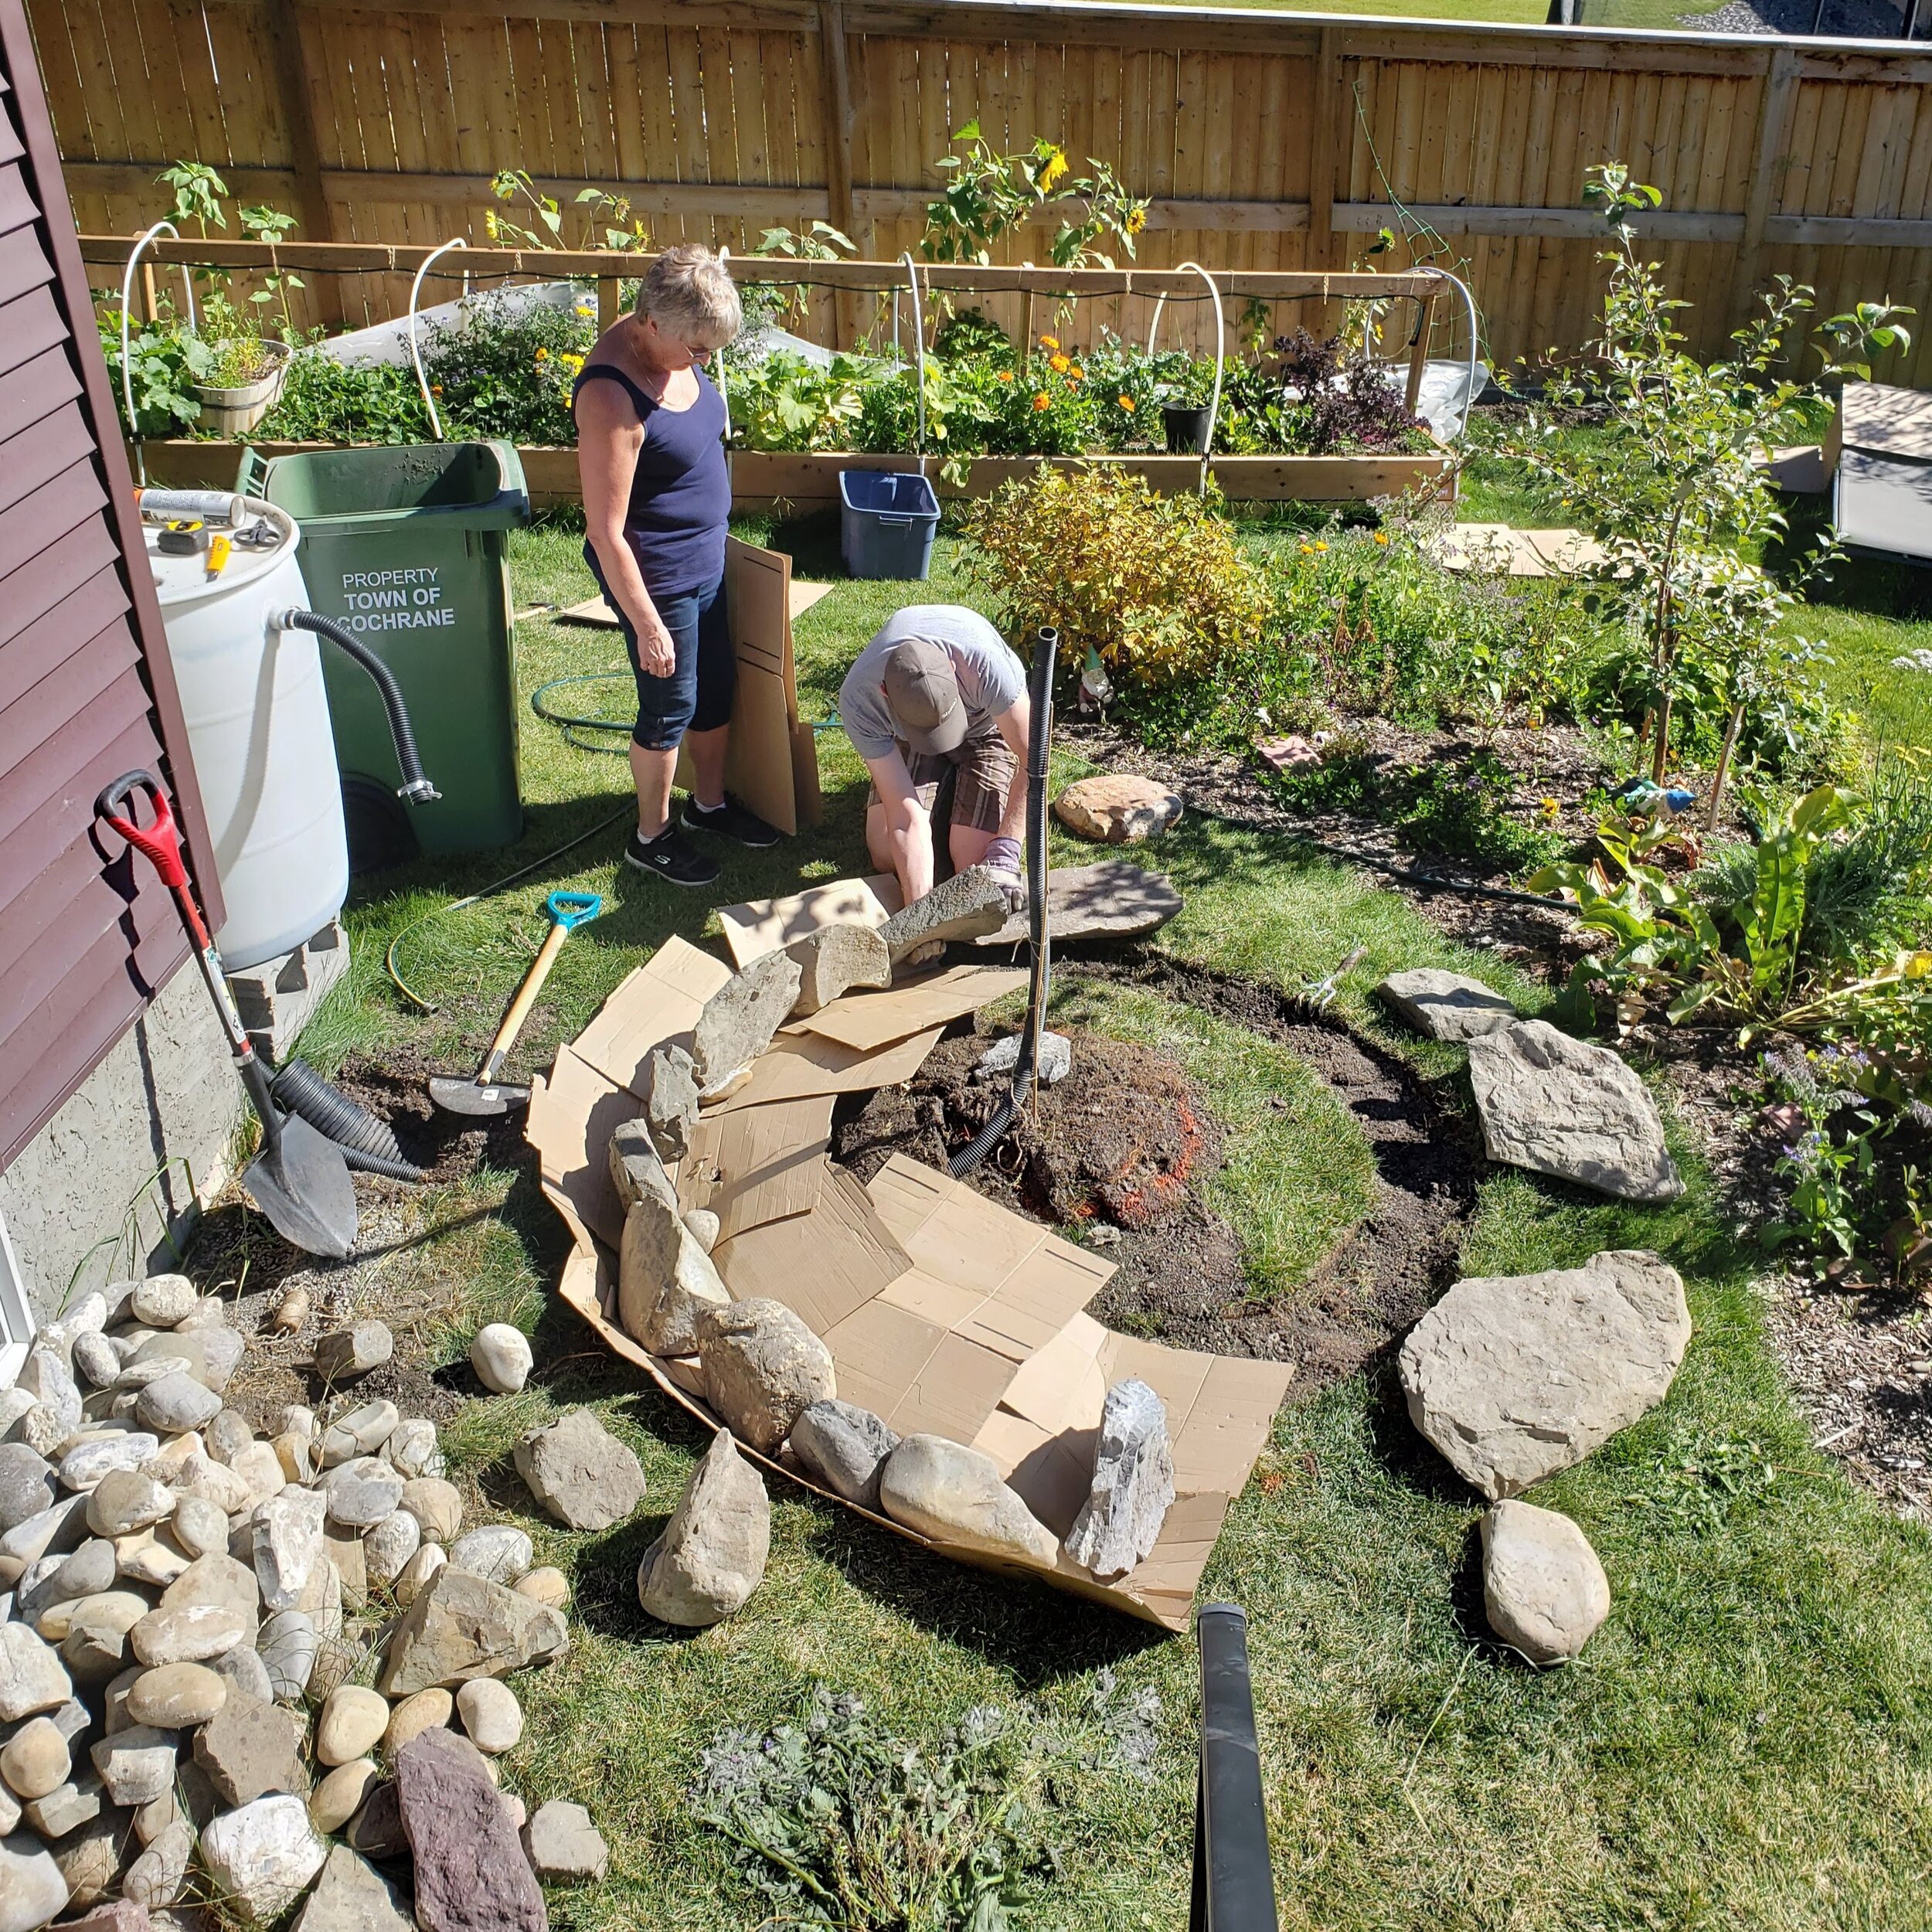
Start creating the outer structure
Now it’s time to start building the outer structure of your herb spiral. You are going to create the outer ring of your herb spiral first. If you are in the Northern Hemisphere, like in the image below, the start of the spiral will be in line with the west, and the structure is going to go counter clockwise. The lowest part of your spiral will be facing north.

Placement of a herb spiral in the Northern Hemisphere

Shape of the outer structure
Start putting soil on the bottom level of the spiral
Fill the bottom layer of your herb spiral with soil. This really is where the expense for your herb spiral comes in - it’s the soil & amendments. Plants will only be growing on the outer foot of this bottom ring, so if you are running low on materials, you can fill that bottom centre with less than desirable soil - for example a loam that has clay or stones. In the new suburb I live in, there is a huge pile of free loam. We really didn’t consider how much soil this was going to take, so you can see we filled the bottom with lovely, dark soil/compost mix.
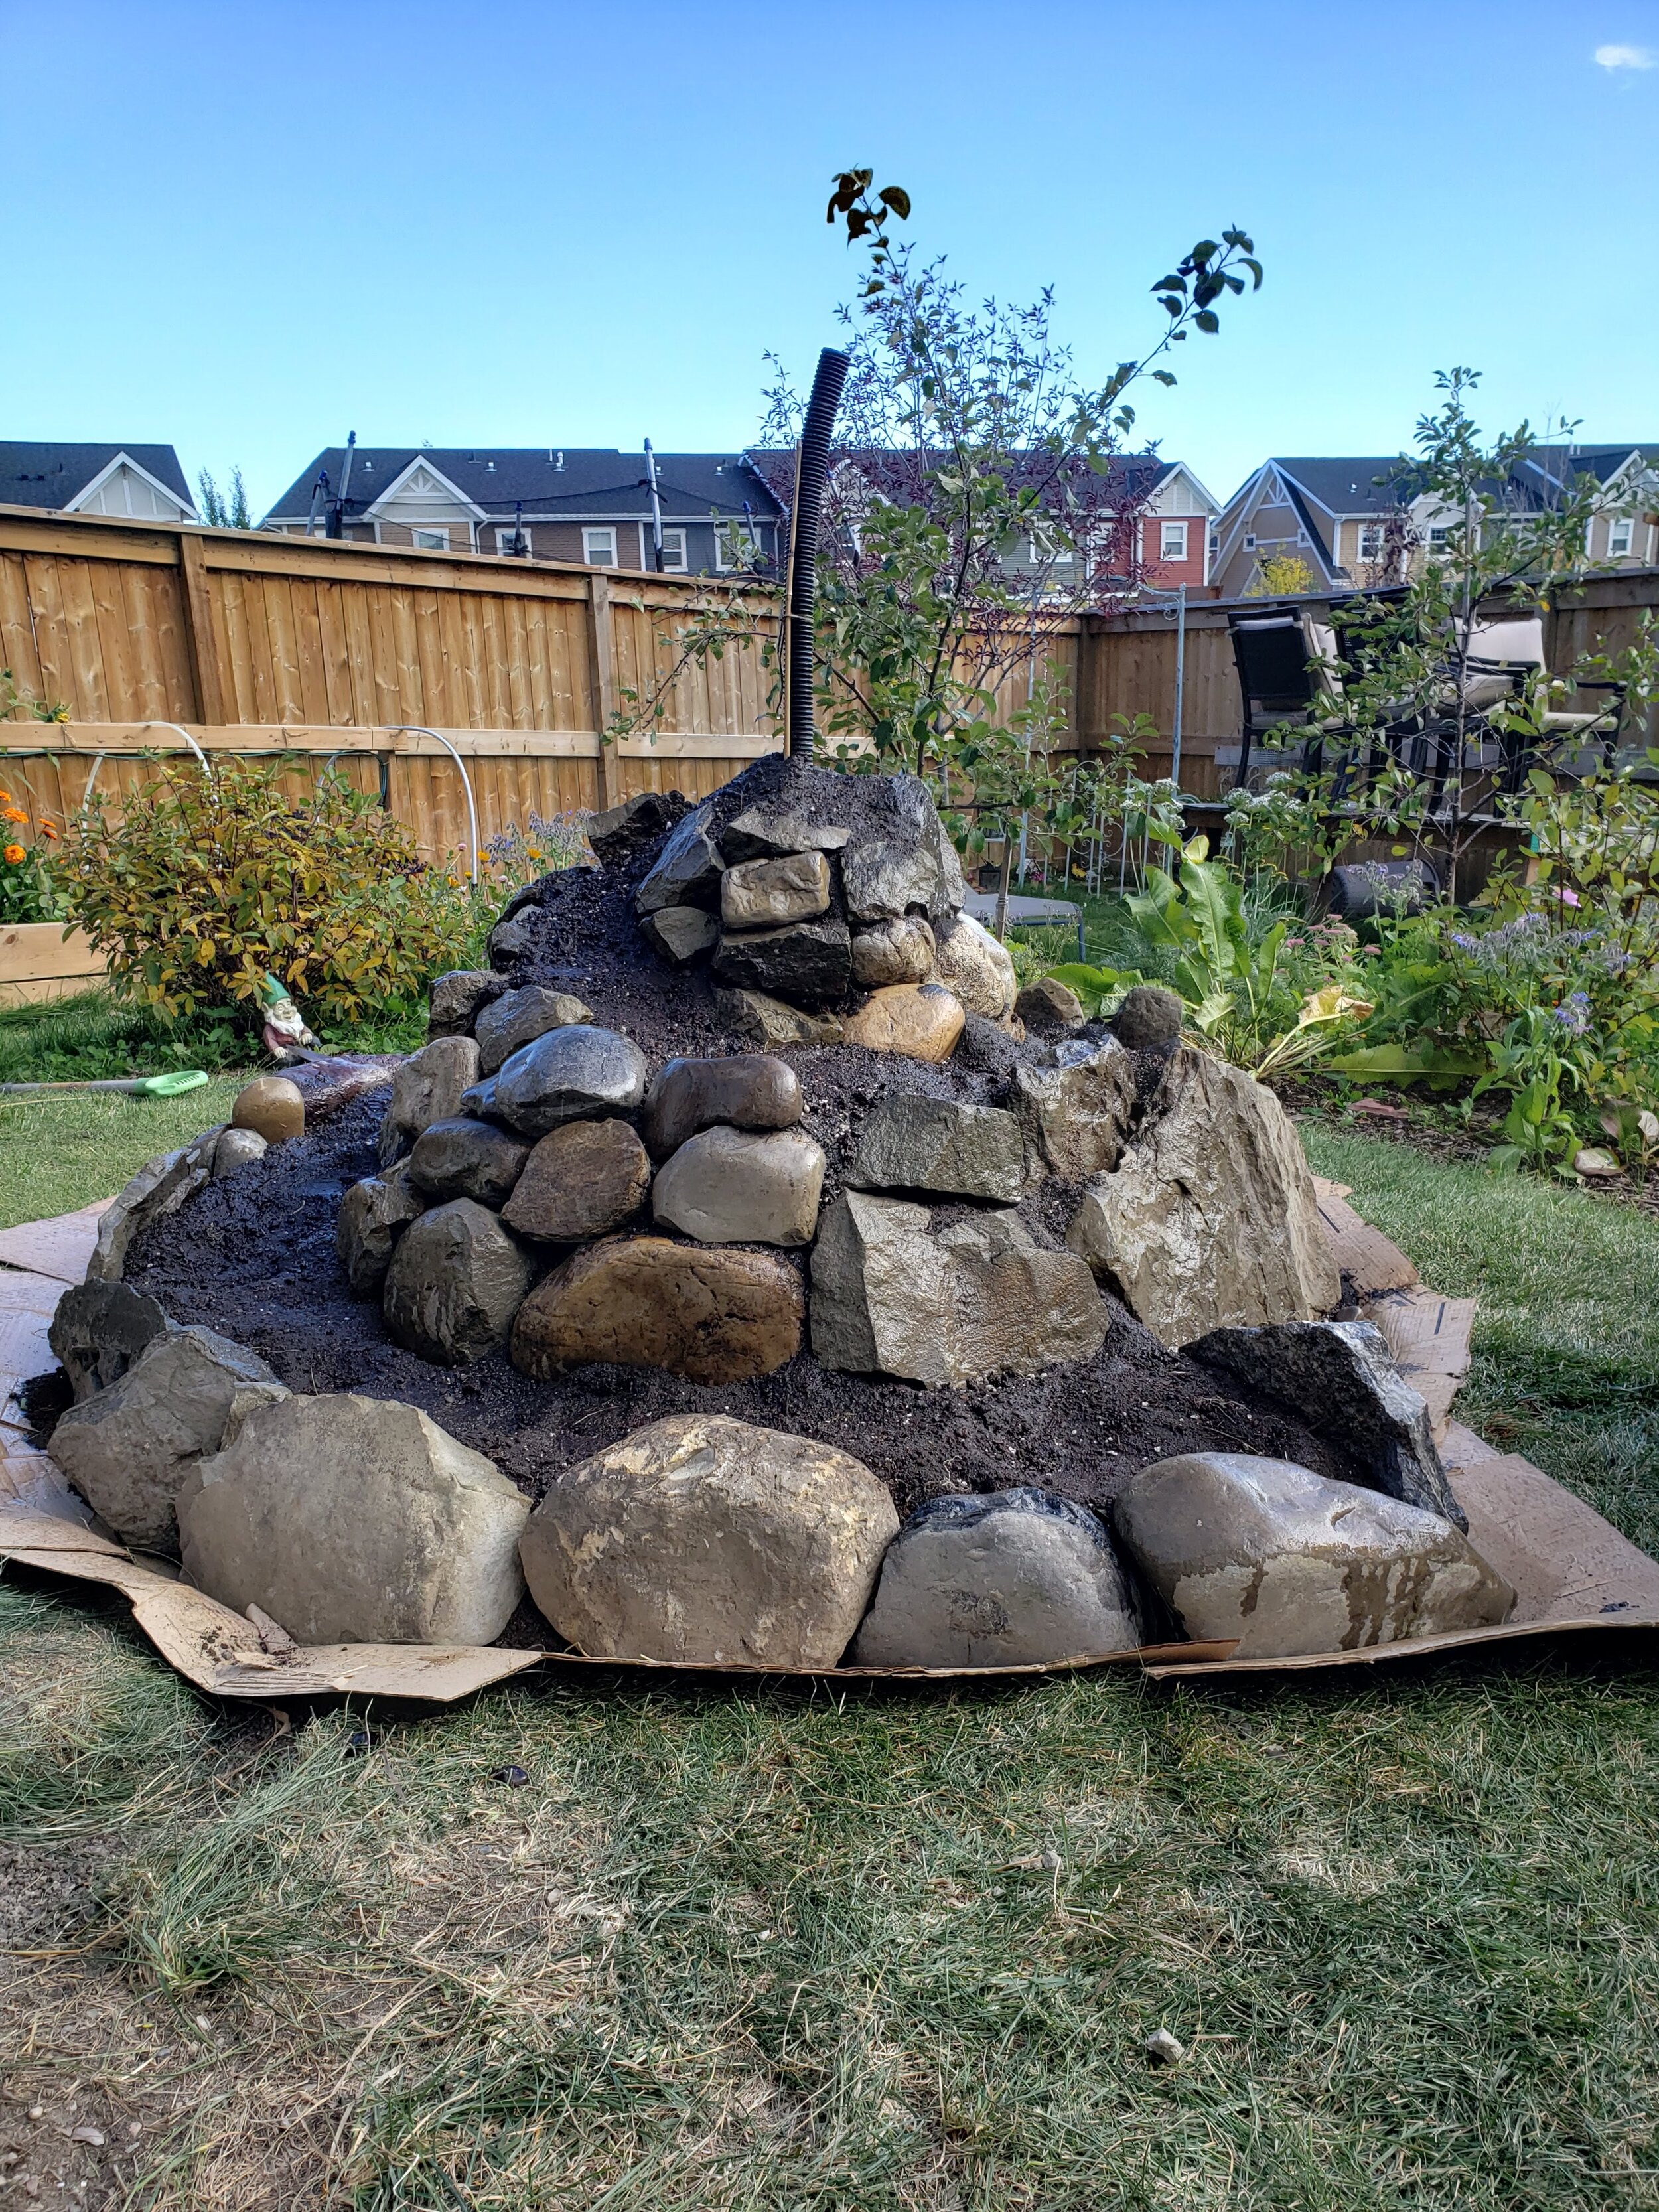
Build up the rocks
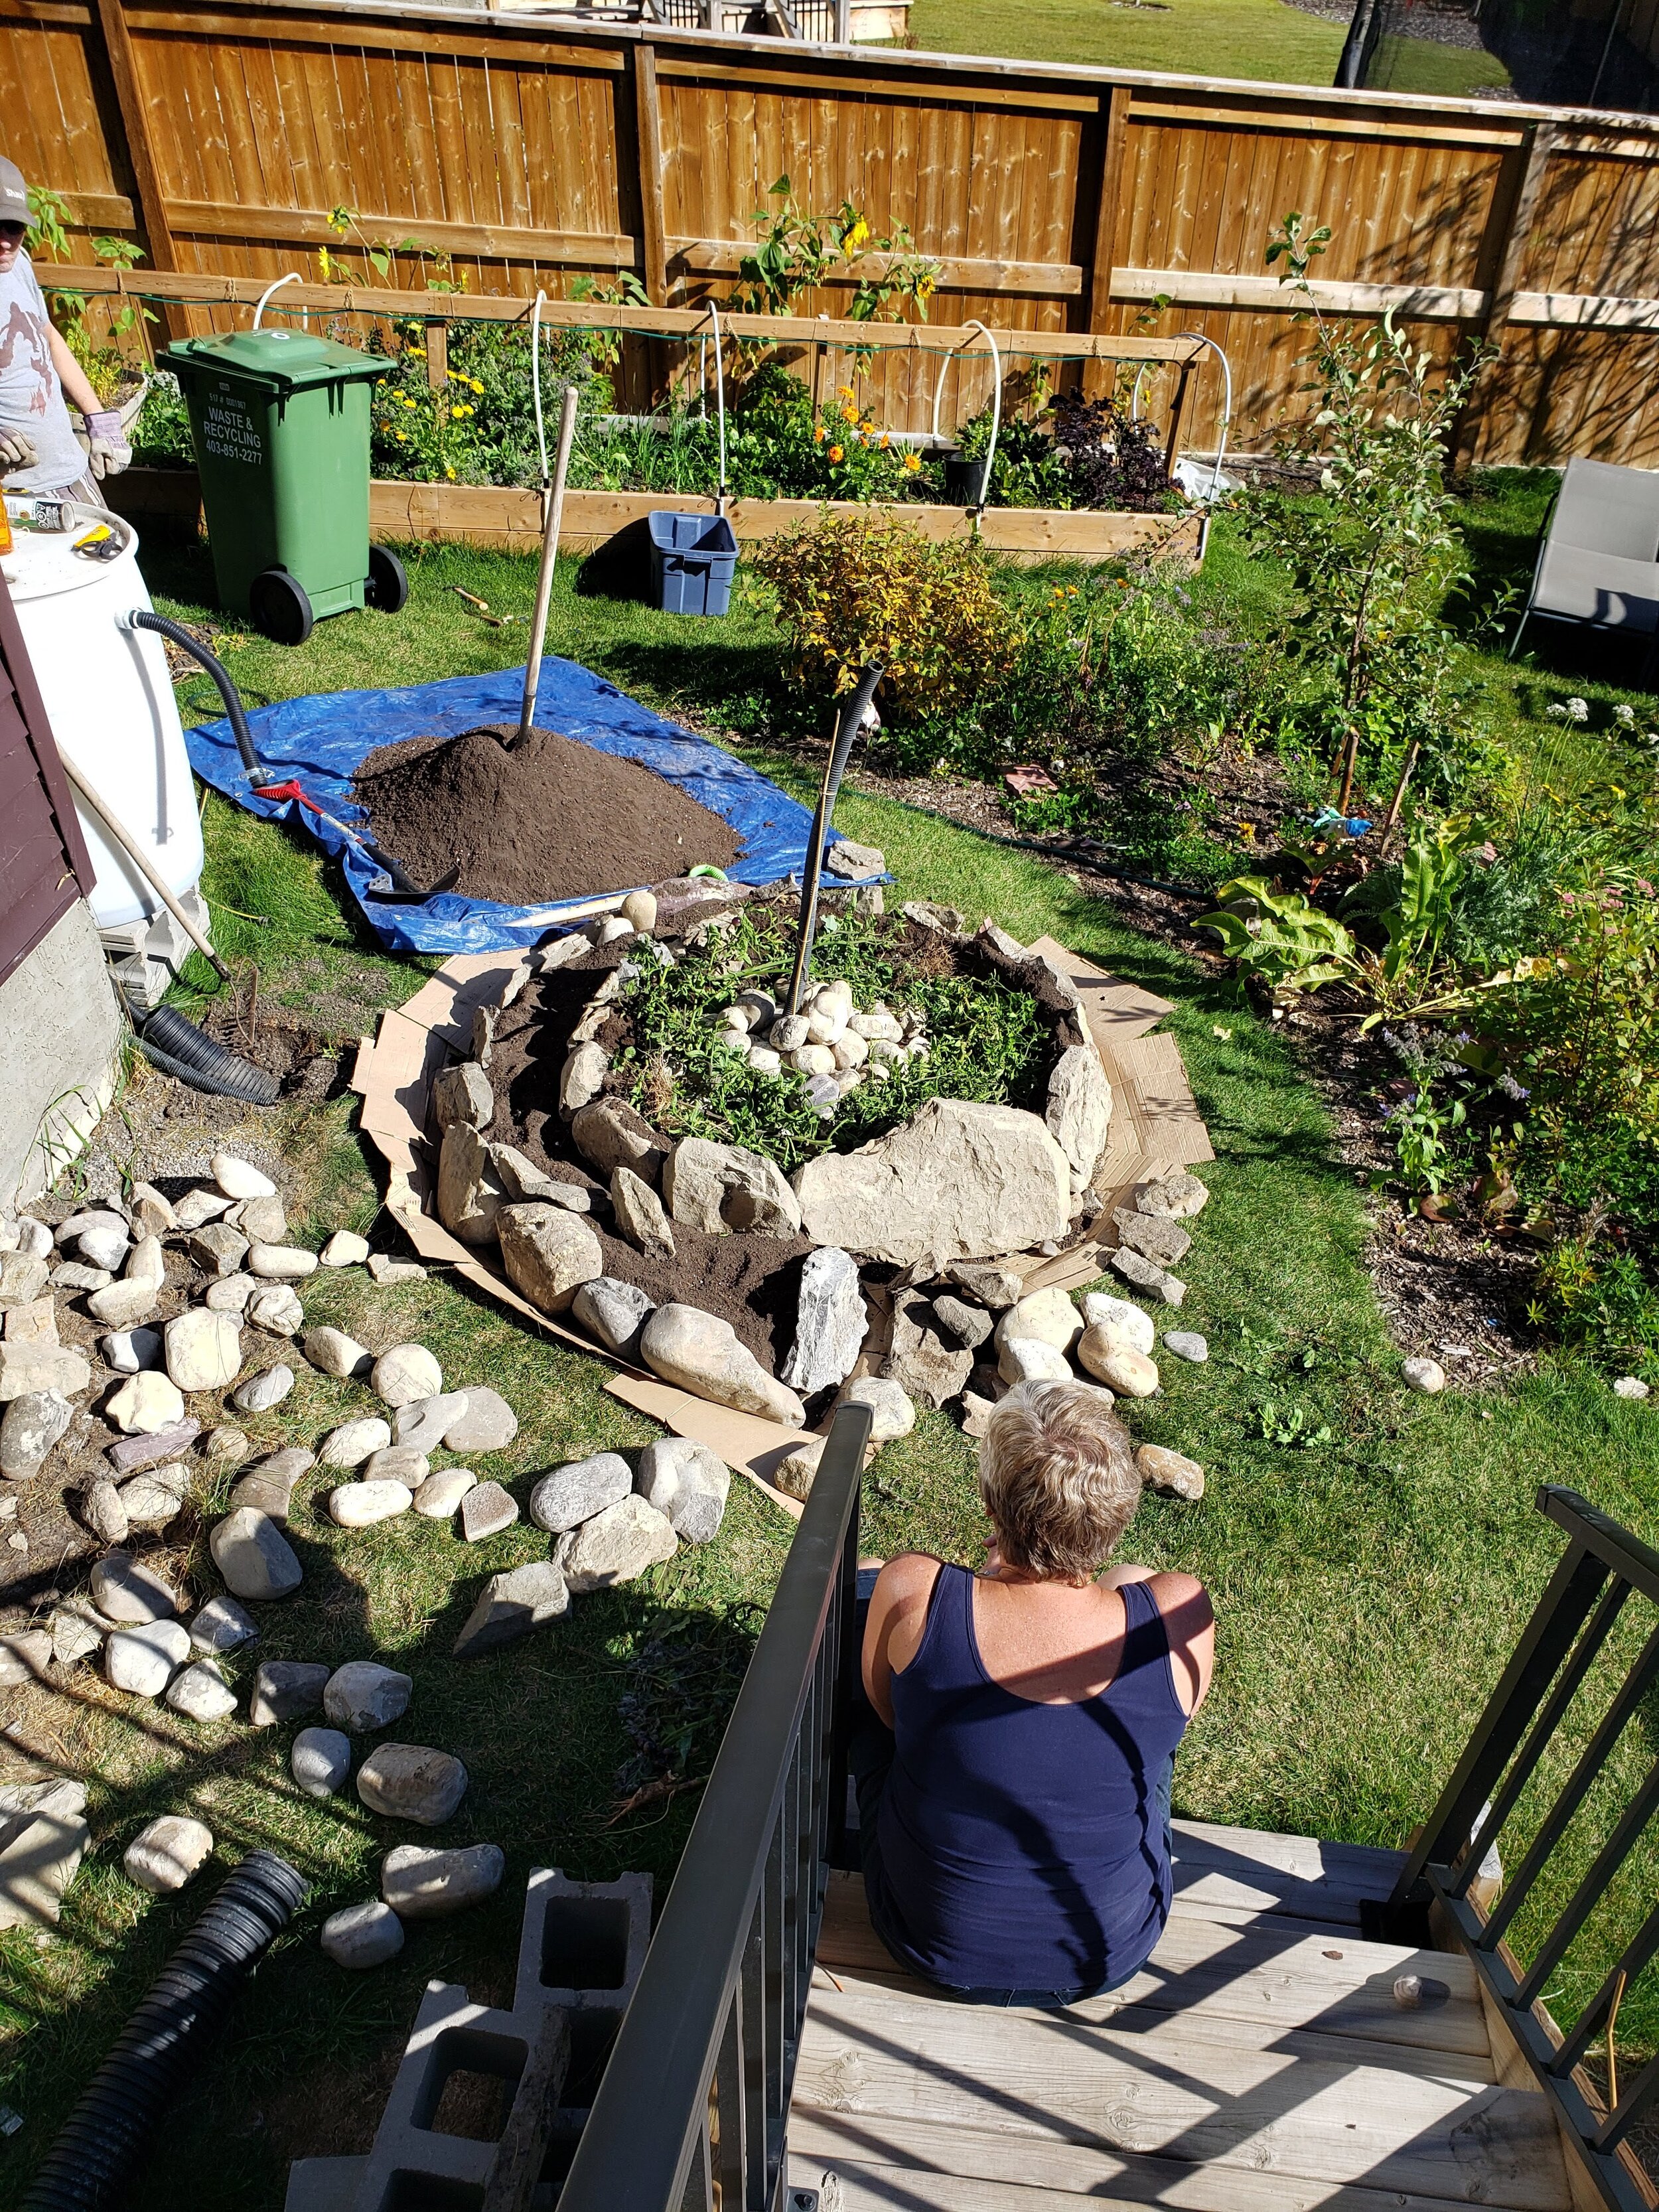
Now it’s time to start building the height of your herb spiral. A common mistake I see with these structures is that they are too low. They really should be as close to three feet tall as you can get them. When they are too low, you start to lose some of the advantages of the microclimates, in particular, shade. On our first build (see image below) we ran into this problem.
In our spiral, we used large rocks to build the bottom of the structure, and then a ‘walls’ of about 3 medium rocks high to create the second and third level of the spiral. We put rocks in the middle to reduce the amount of soil we would need, and increase drainage, our heavy clay soil is always begging for better drainage. We also layered some ‘green manure’ under the soil as a compostable material. We build our spiral in the fall, it had a full season to sit before we planted in it.
Water it down
The final step is to water the soil down. It will settle, and you’ll likely need to top it up. Or in our case, there will be a wind storm, and half of it will blow away.

Create the mulch barrier
You can see above that we have grass going right up to the border of our spiral. We learned our lesson with our annual bed - if you leave grass at the edge of the herb spiral, you will be growing grass in your herb spiral. We chose to create a wide wood mulch barrier around the structure. We’re tossing around the idea of putting a pond at the base of the herb spiral - so that’s an optional add on as well.
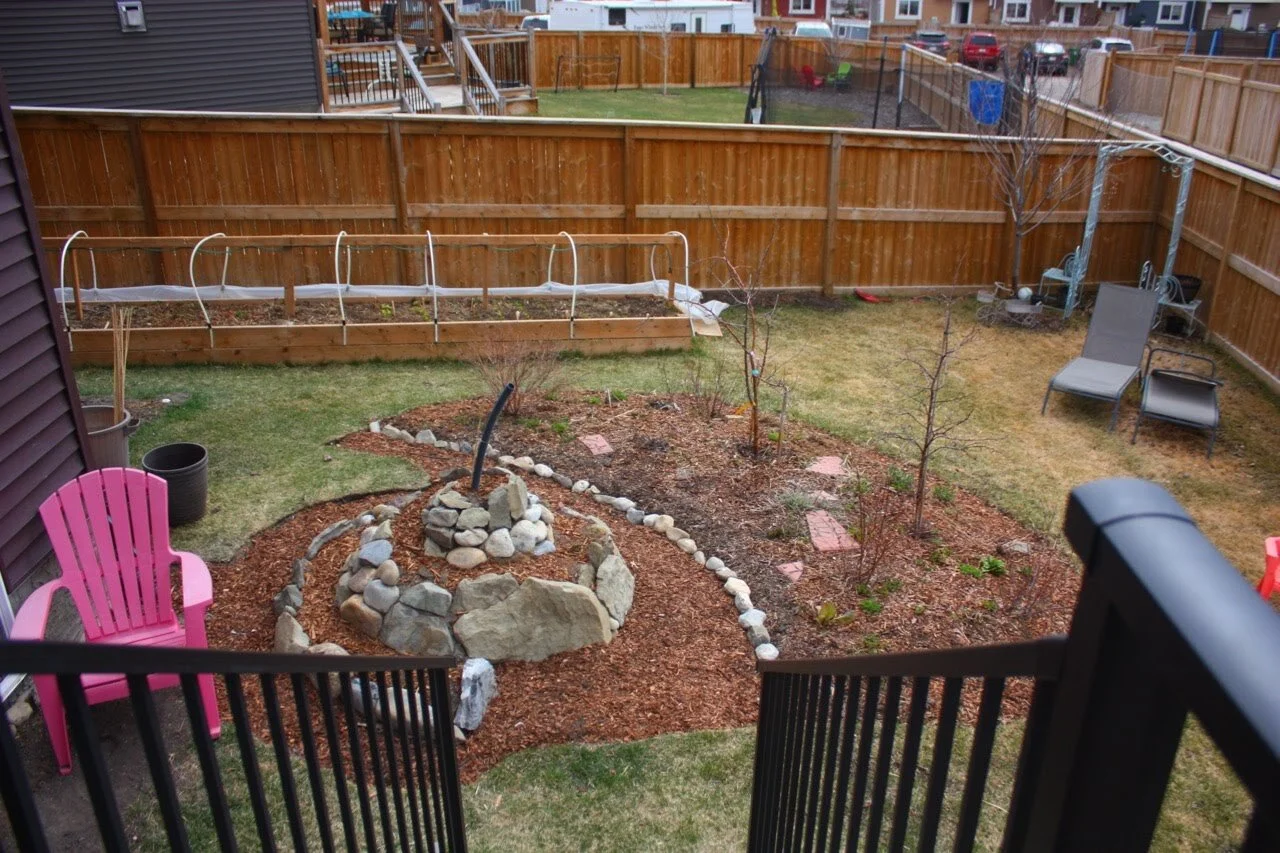
Mulch barrier around the herb spiral
Next, it’s time to plant your spiral. In our first year growing in the spiral, we learned some important lessons that I can’t wait to share! Please don’t hesitate to ask any questions below in the comments.
If you love the idea of creating a beautiful, edible, functional space in your yard, but don’t know how to get started, contact me. I would love to help.